Friday, October 21, 2011

Complete, At Last


Some detail of the what lies within:
the door knobs are two lamp work beads with antiqued brads.
Some seashells and coral from a friend's trip to Florida for a Judo competition and the crucified Christ is made from floral wire, wrapped in twill tape that was inked with terra cotta chalk ink. The face is Fimo clay, also inked . The nails are crimp beads and the cross is layered in handmade paper from China, newspaper and twill tape that was stamped with more Lumiere paints. The Christ and Sun were sprayed with Smooch Spray in Gold and Vanilla.


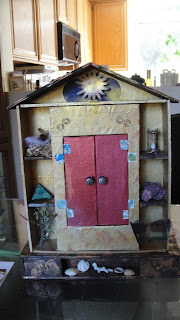

The last photo is the completed piece. After it was finished, I really wanted to keep it, rather than auction it off. It pleased me, not only because it was complete, but because I had faced the challenge ... stepped way, way out of my comfort zone.
I was completely fascinated by the process of building, assembling and finding the objects for the shrine. Each piece of the process was a true joy for me and I'm looking forward to creating similar pieces.

Tuesday, October 18, 2011

The shrine comes together - at last


Poor shrine! It sat, in pieces, unattended for more than a month. I dislike that life gets in the way of art, but it happens.
Here are some photos of the piece coming together:

Friday, August 26, 2011

Have art, will travel


more painting today - adding some dimension to the pieces - flat paint is about the most boring thing on earth.

I've been working on my lunch hours, in the break room, so I have to carry my supplies to and from work. I prefer my studio, but a girl's gotta do what a girl's gotta do.

BTW - I've been working with LUMIERe PAINTS by Jacquard to add that special touch. I found this paint a few years ago when I was working on some stoles for our clergy at church.
The paints are so easy to work with and though they are primarily for fabric, they are awesome in other applications as well. I have rubber stamped with them, used them on paper and wood and metal. Great stuff, that!
You can check them out here:lumiere


Thursday, August 25, 2011


Now the painting has begun - I have a vision of what I want it to look like and yet, until it comes out of my hands, I will only know if this is it or not. I wonder just how many times I could repaint it before it completely fell apart.

As I try to achieve my vision, I am already thinking ahead to the actual building. I am thinking that some brass nails would add a great deal to the interest of the actual piece - think of a piece of upholstered furniture with studded accents.


The Building of a shrine - part deux


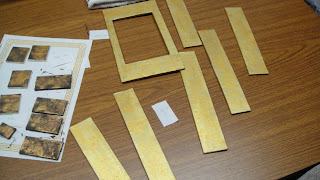
The shrine and I continue on our creative journey - through the papering process, as seen above. It was indeed a sort of peaceful thing to do - the papering. It was quiet, contemplative time as I thought about where each piece would go and what treasures the niches might hold.


Friday, August 12, 2011

What's new


One cannot live by cards alone - I have started to build my first shrine -
I want to document each step of the process and being me- got a book - one can do anything with a book or internet instructions - right?
Anyway - first step - cut the pieces from foam core - why not balsa wood? Heck if I know, but I was following instructions - so here are the pieces cut and put together -
Step 2 - cover each of the pieces (about 25 of them) with rice paper. The rice paper will presumably keep the foam core from warping when the layers of paint and glue are applied.

This is, in my estimation, madness, although as I sat in the studio last Saturday, cutting and wrapping each piece, I found a sense of peace and some satisfaction in creating each piece of this shrine. I feel like I'm really building something.
My sense of peace aside, the next shrine will be from balsa wood!
The next steps will be paint and assembly. Stay tuned for more photos

Wednesday, July 6, 2011

Stampin is awesome and....


Sometimes I like to shake it up a bit. Here are some dry embossed cards that I've been working on. I hope you like them.